

In this tutorial I’m going to demonstrate the Interactive Text (aka animated text) component of the plugin SiteOrigin Widgets by CodeLights. This component has five animations that you can apply to your text to bring it to life, perfect for emphasising a key element of your product or service offering.
So far in this series, I’ve covered the flipbox, the Interactive Banner (aka the animated hover effect), and the modal popup components of this plugin. There is a minor issue that I’ve encountered with the Interactive Text component but it’s easy enough to work around; I’ll explain later.
The Examples
As I’ve already mentioned, there are five text animation effects:
- Fade in the whole part
Divi Notes...
- Flip the whole part
Divi Notes...
- Flip character by character
Divi Notes...
- Zoom in the whole part
Divi Notes...
- Zoom in character by character
Divi Notes...
How cool is that!?!? You can check out the official demo of this component on the CodeLights website: Interactive Text.
Configuring The Animated Text
Configuring the animated text begins when you click on the CodeLights icon on the HTML editor toolbar. Once you’ve done that you’ll be presented with the six components that this plugin comes with. Choose Interactive Text and the following window will appear:
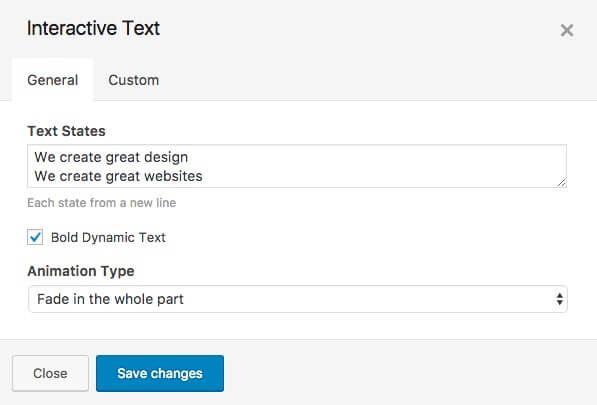
For the animation effect to work, you need to enter more than one line of text and the words that you want to be static must appear in each line. In other words, in the examples above, I’ve used the following text:
Divi Notes…
Divi Tips & Tricks
Divi Tutorials
You’ll see that the word Divi is static whereas the other words are animated.
Now, do you remember I said that there was a minor issue that I encountered with this plugin? When you enter text into the Text States textbox, if you press return on your keyboard or even shift+return, instead of your cursor dropping down to the next line, the Divi module window that you’re working in will save and exit leaving the Interactive Text window open. Fortunately, the workaround is quite easy, all you need to do is to place a <br> tag (line break) after each state rather than try and place each state on a new line. You could also type your text up in a simple text editor and copy and paste it into the text box.
Under the Custom tab, you’ll find a few settings that you can use to customize the text. Of the available settings, you’ll probably find the most useful is the Animation Duration field. In the examples above all but the first have an animation duration of 2000 milliseconds, much slower than the default 300.
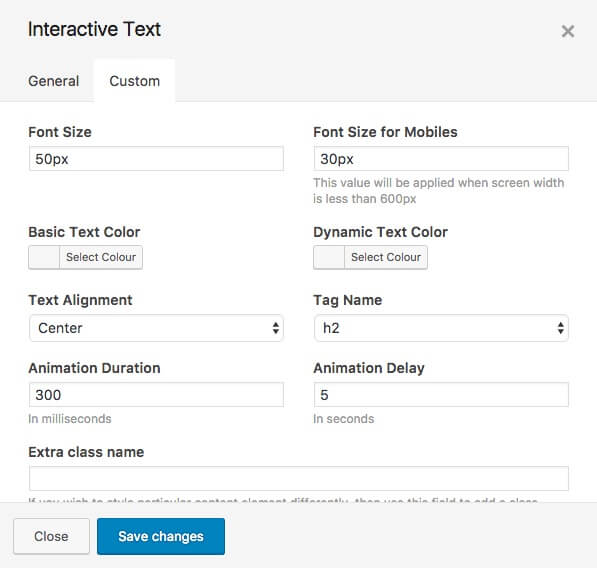
I’m sure that all the other settings are self explanatory so I won’t go through all of them.
Wrapping It Up
And there you have it, another very useful addition to your Divi toolbox and best of all is that this one plugin delivers six very useful effects. If you haven’t already checked it out, have a look at my typing text tutorial for another great way to bring your text to life.
Photo by Moritz Schmidt on Unsplash


great tutorial, thanks Rob. I’m raring to find an instance to use this in…
Hey Rob, thanks for this! I’m battling to get the text to format properly with the assigned heading tags – is it possible to change the font, or does the default override it? (maybe more fundamentally, is it compatible with Divi 3.0, or are the bugs I’m experiencing come from being unsupported?) Thanks for any ideas!