
Although the Divi theme comes with over 80 fonts, Google Fonts has over 700 to choose from. Adding additional fonts to your Divi installation is extremely easy.
Here are a few easy steps you’ll need to follow.
Find Your Font
Head on over to Google Fonts and look for the fonts you want to add to Divi. In the screenshot below, I’ve switch the “Grumpy wizards” pangram Google uses for the traditional “The quick brown fox jumps over the lazy dog” alternative. In case you’re wondering, a pangram is a phrase that contains all the letters of the english alphabet.
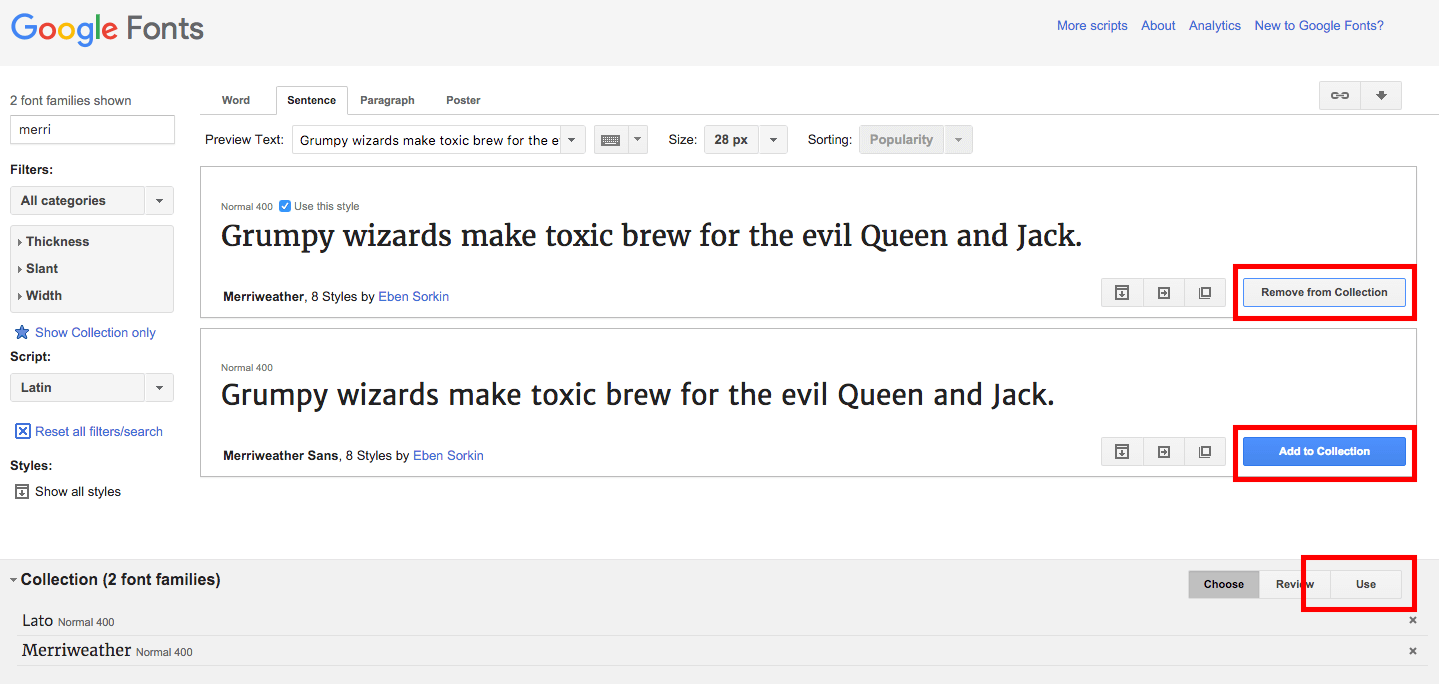
Google have a wonderful little sidebar with a number of options you can use the filter their vast collection of fonts by. You can search by name if you know exactly what you’re looking for or else by category etc. If you’re looking for some font inspiration, and you’re using Chrome, make sure you install WhatFont. It’s a brilliant little extension that displays the font details of any font you click on in your browser. When you’re done reading this one, another article worth reading is 10 Web Typography Rules Every Designer Should Know.
Add to Collection
As you find the fonts you want to use, add them to your collection by clicking the Add to Collection button. Don’t go overboard because fonts do impact your page speed. As a rule of thumb, I would stick with three fonts at most.
Embed Your Collection into Your Website
As you build your collection of fonts, you’ll see them added to the Collection pane at the bottom of the screen. When you’re done collecting, click on the Use button on the right hand side of this pane. This will take you to the settings page where you’ll be able to see the various styles available for you to use on your site as well as the impact these styles will have on your page load time.
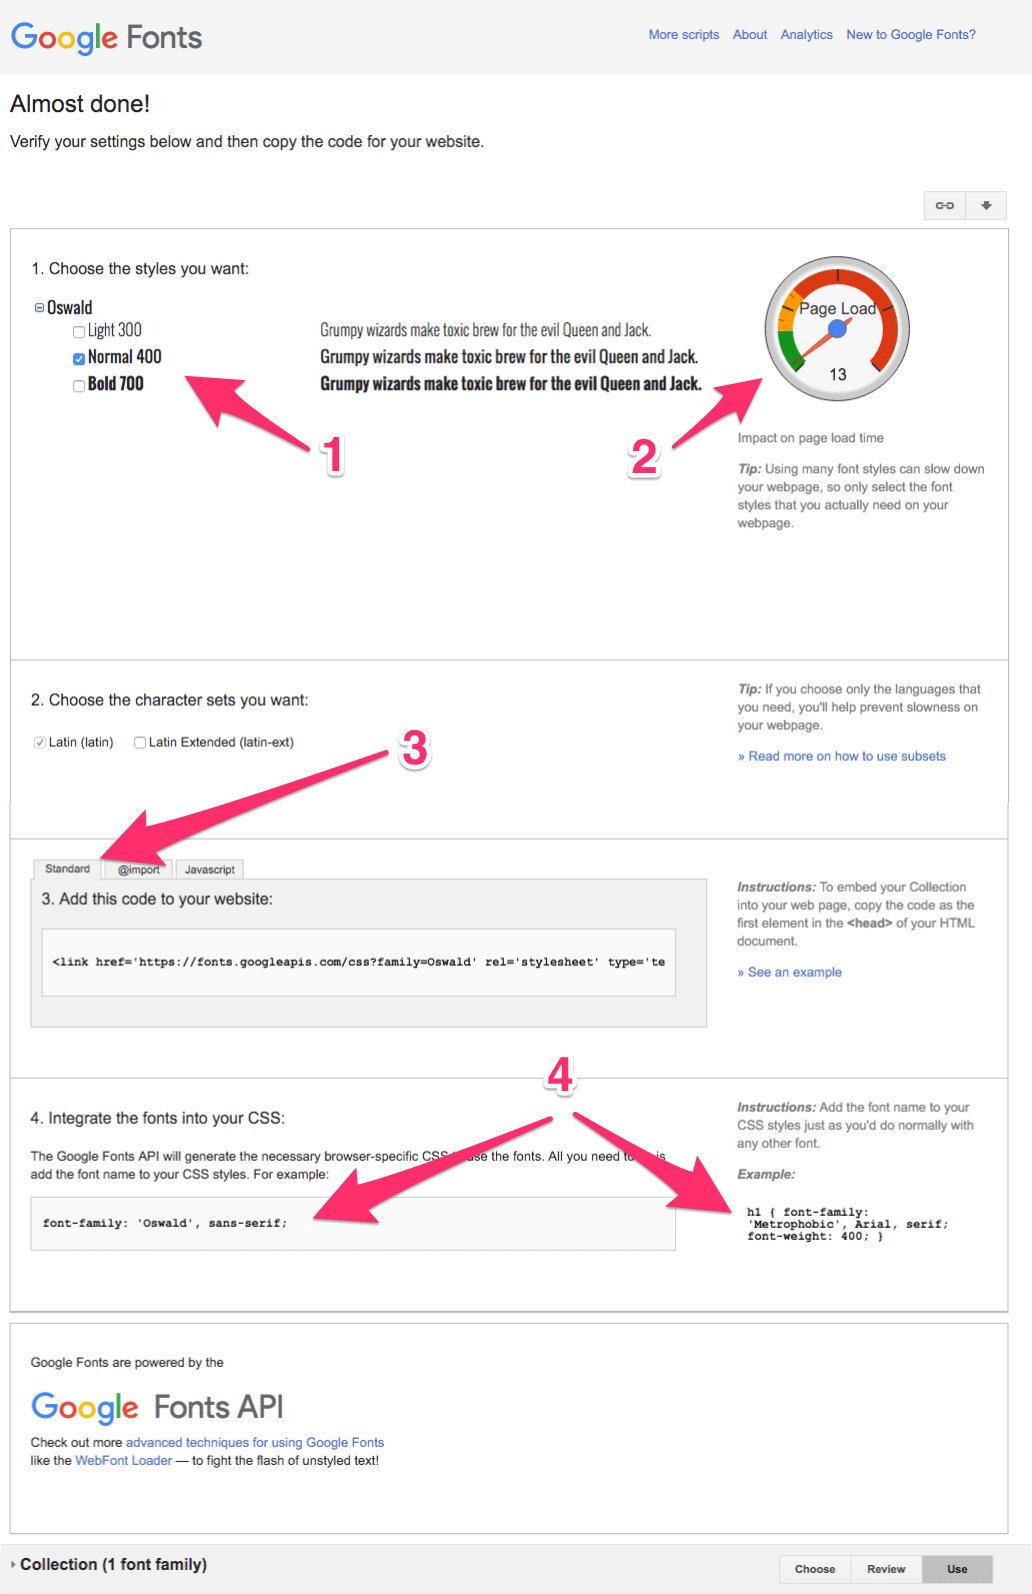
Choose Your Settings
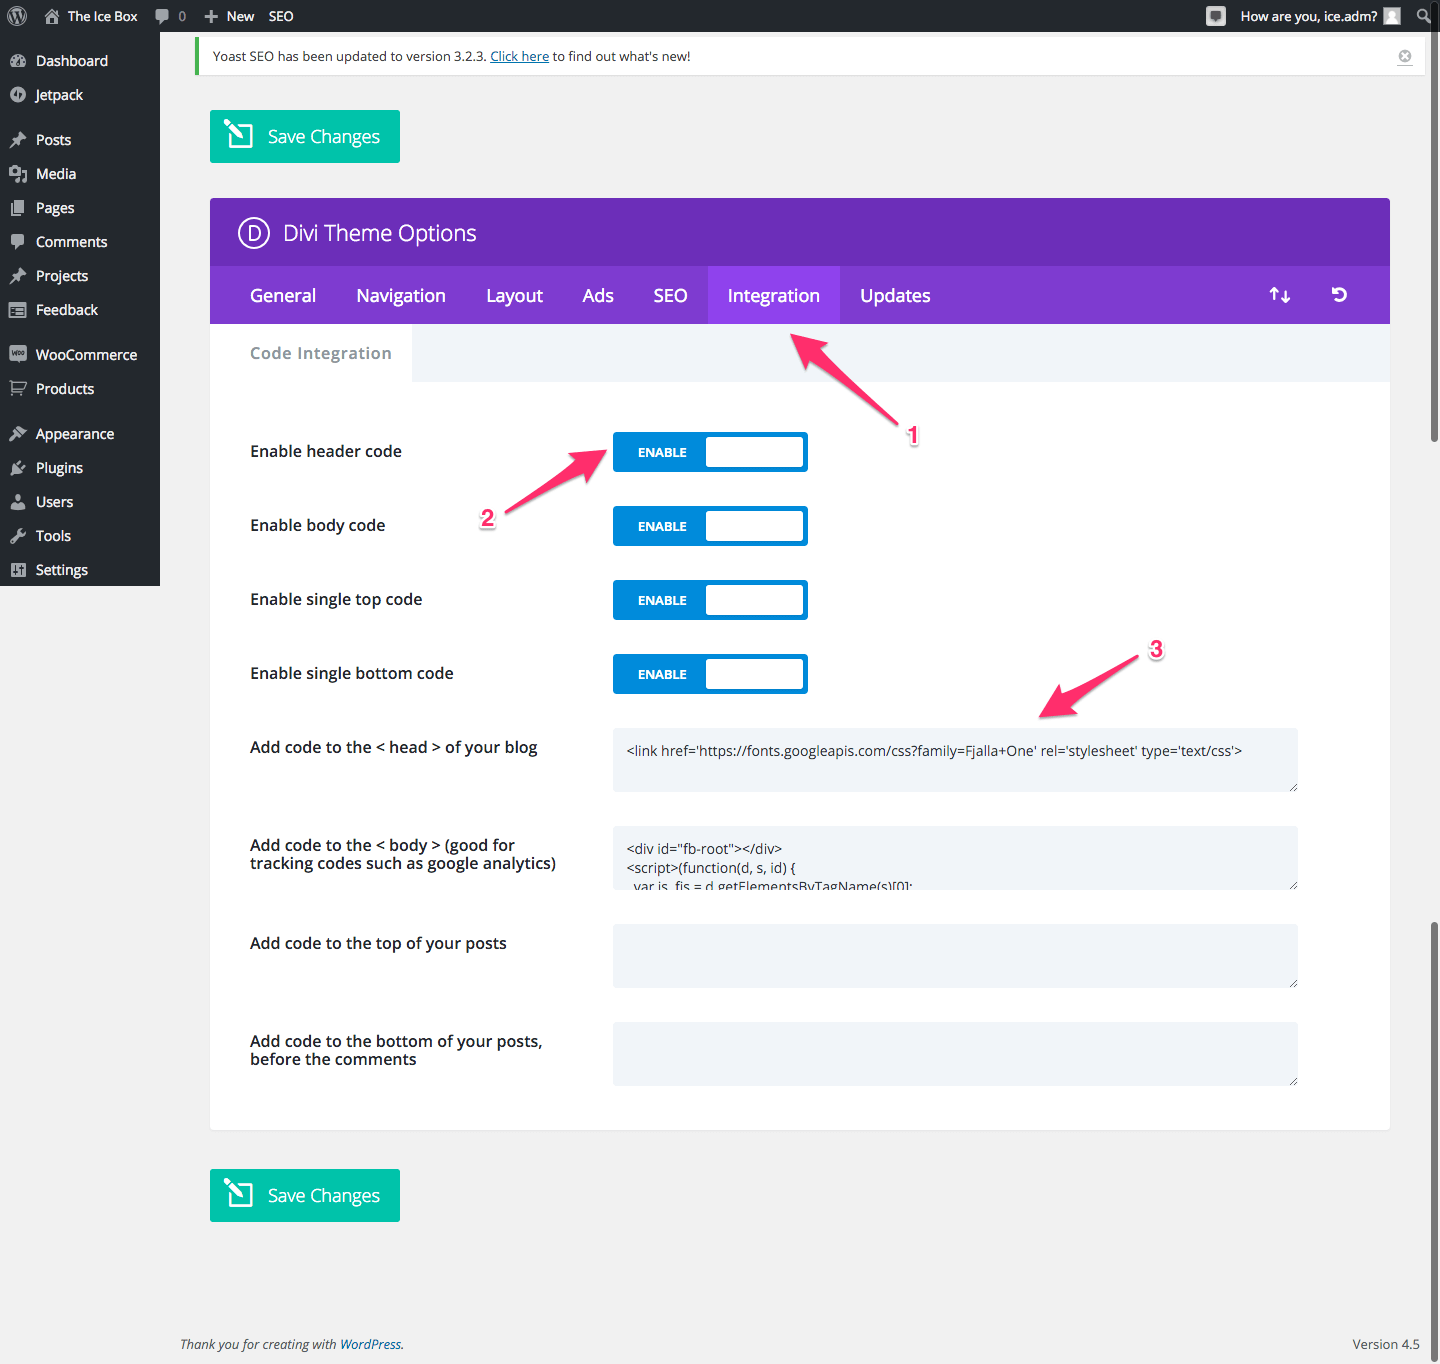
On the settings page, there are a few settings that you can play with. In the screenshot above, you’ll see that you have the option to choose which styles you want to include for your chosen fonts (arrow #1). As you choose styles, watch the gauge on the right to see what impact your choices have on the page load time (arrow #2). When you’re done, copy the text in the Standard tab of section three (arrow #3). Now navigate to your Divi Theme Options (Dashboard > Divi > Theme Options) and click on the Integration tab (arrow #1 in the screenshot below).
Add Code to Header
The first thing you need to do is to make sure you enable header code (arrow #2 below). Now paste the code you copied earlier and paste it into the first text area labeled “Add code to the <head> of your blog” (arrow #3) below.
Using The Newly Added Fonts
Now that you’ve got all that sorted, you simply need to add the add the font family to your CSS styles. If you look at arrow #4 in the second last screenshot, you’ll see an example of how to do this. In essence, all you need to do is add the font-family attribute to the element you’re targeting. For example, if you want your H1 element to use the font Fjalla One, you would insert the following code into your style.css file:
Conclusion
And that folks, is how easy it is to add additional Google Fonts to your Divi Theme.


Thank you so much Rob!
Its easy to use Divi’s built-in fonts but adding Google Fonts into the mix really opens up possibilities! This is very useful, thanks again 🙂
you might have to redo this post – as or 2017 – Divi just added a procedure to do this into the divi theme/visual builder itself. https://www.elegantthemes.com/blog/theme-releases/divi-font-options-update